The widget and customer identity
The chat widget is how customers reach Chargeless on your site. This page covers adding it to your pages, verifying who the customer is, and what the customer sees.
1. Allow your pages
The widget only runs on pages you list. In Settings → Widget, add every origin that embeds it under Allowed origins, written exactly as the browser shows location.origin: https://shop.example.com (lower-case, no trailing slash, no :443). Plain http works only on localhost while you develop.
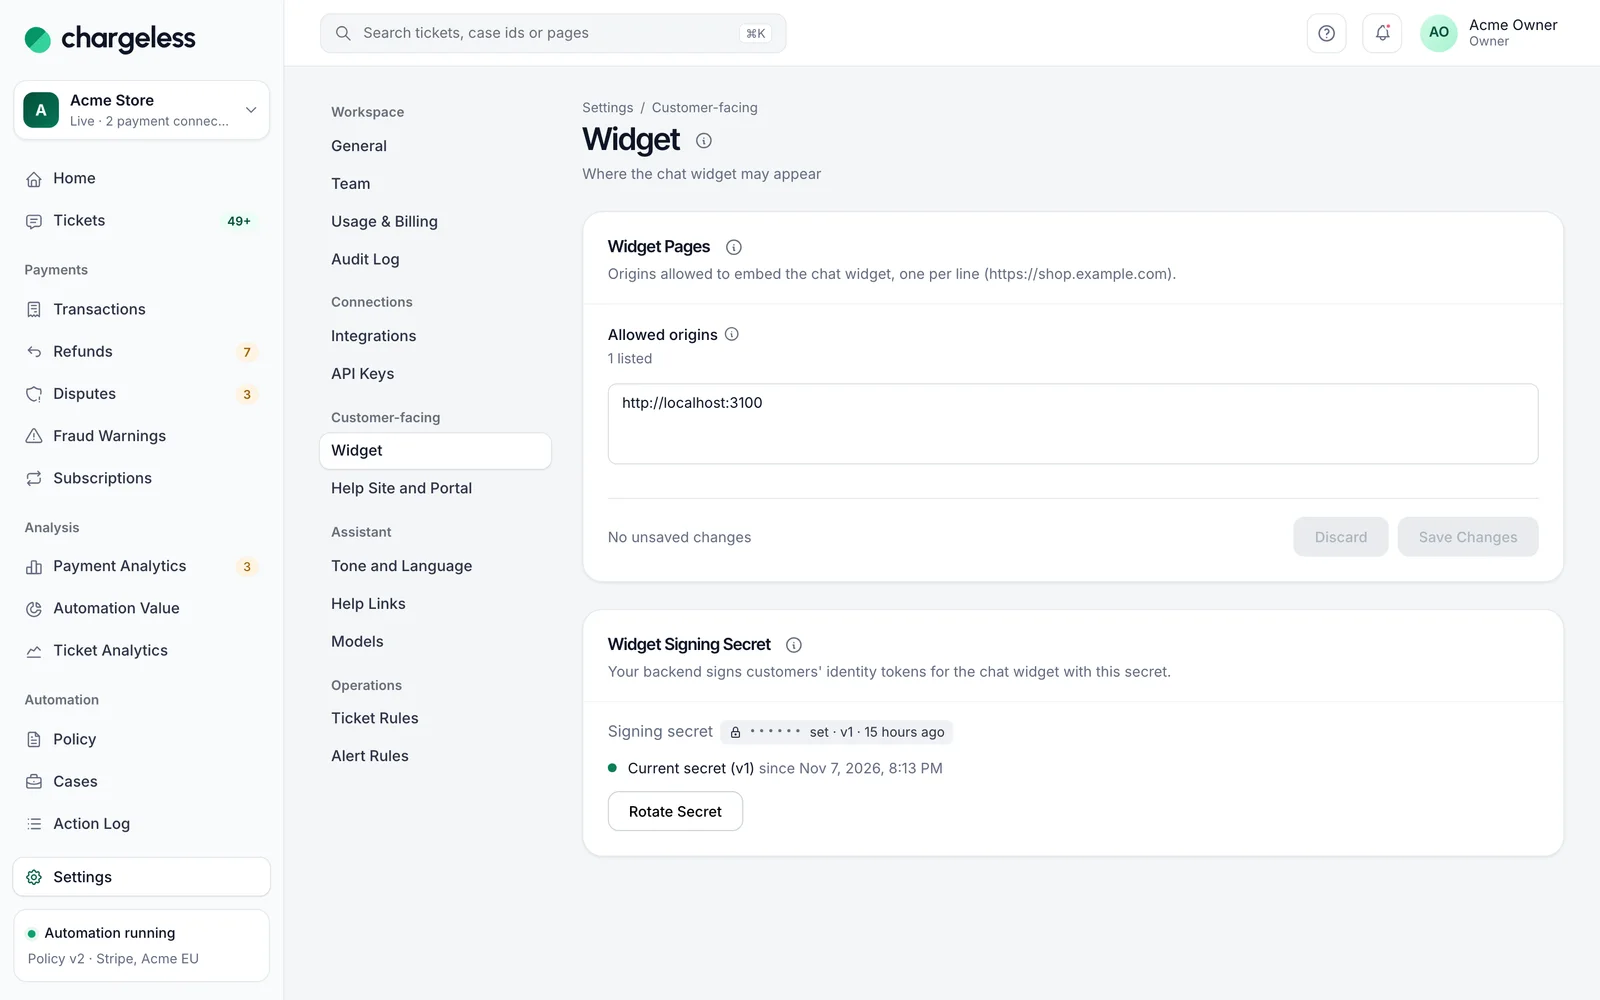
An empty list turns the widget off. A page that is not listed shows "This site is not allowed to show this support widget."
2. Add the snippet
Add the loader to every page where the widget should appear. Your Workspace ID is in Settings → General. Use the CDN and agent addresses Chargeless gives you; the examples below use the defaults.
<script
  src="https://cdn.chargeless.io/v1/loader.js"
  data-tenant="YOUR-WORKSPACE-ID"
  data-agent-url="https://agent.chargeless.io"
  data-locale="en"
  data-title="Support"
  data-theme-primary="#0f766e"
></script>
Or, to control when the widget starts and to pass a signed-in customer's identity:
<script src="https://cdn.chargeless.io/v1/loader.js"></script>
<script>
  SupportRoute.init({
    tenantId: 'YOUR-WORKSPACE-ID',
    agentUrl: 'https://agent.chargeless.io',
    identityToken: tokenFromYourServer, // optional, see below
    locale: 'en',        // en, tr, es, pt-BR, fr, ar, ru; defaults to the browser language
    position: 'right',   // or 'left'
    launcher: true,      // false if you render your own button and call SupportRoute.open()
    mode: 'chat',        // 'form' opens straight into "leave a message"
  });
</script>
Things to know:
- Load it as a plain
<script src>(asyncanddeferare fine), not as a module or through a bundler, and withoutintegrityorcrossorigin. - Your Content Security Policy needs only
script-srcandframe-srcfor the CDN host. - Your page needs
<meta name="viewport" content="width=device-width, initial-scale=1">so the widget goes full screen correctly on phones. - Colours:
data-theme-primary(ortheme: {'--sr-primary': …}ininit). - API:
SupportRoute.init(),open(),close(),identify(token),on('event' | 'state', fn). - Events (
opened,closed,identified,message_sent,reply,action,handoff,target_selected,confirmation,error) never contain what the customer typed, an email, an id or an amount, so you can forward them to your analytics.
The technical reference, including self-hosting and every header the CDN sends, is in sr-widget/docs/embed.md.
3. Verify the customer
Chargeless shows a customer's payments, and acts on them, only after the customer proves who they are. Your policy's Identity step decides which methods count (see Policy → Identity).
Email code
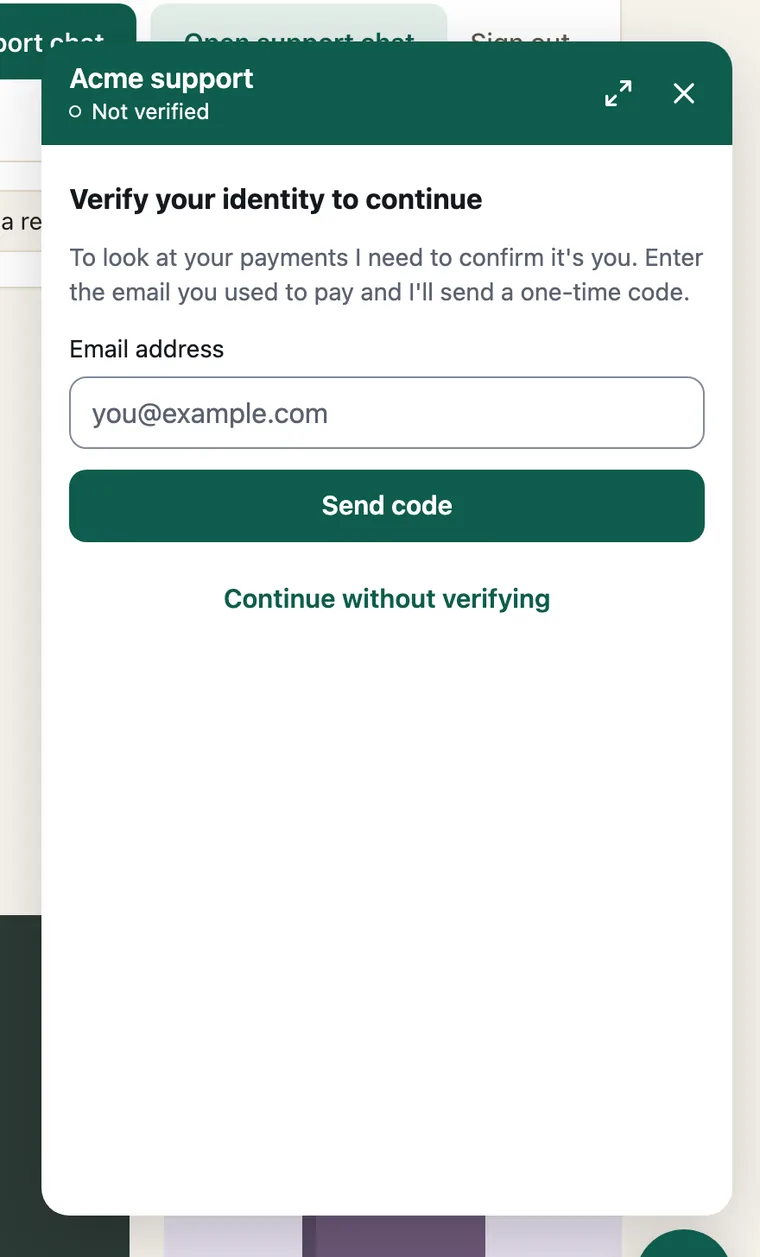
Works with no work on your side. The customer types the email address they paid with and gets a six-digit code (valid for 10 minutes, 5 tries, at most 3 codes per 15 minutes). The widget behaves the same whether or not the address is known, so it reveals nothing about who your customers are.
Signed token (customers signed in on your site)
If customers sign in on your site, your server can vouch for them: the chat starts verified and the customer is never asked for a code.
In Settings → Widget → Widget Signing Secret, choose Generate secret. Confirm with your authenticator code, copy the secret (it starts with
srwgt_) and store it on your server. It is shown only once.On your server, for a signed-in customer, create an HS256 JWT signed with that secret:
Claim Value subthe customer's id at your payment provider, e.g. Stripe's cus_…tenantyour Workspace ID emailoptional connectionoptional: the payment connection the customer belongs to (from Settings → Integrations). Without it, your first connection is used. iatissue time expat most one hour ahead Pass it to the widget as
identityTokenininit, or later withSupportRoute.identify(token)(for example after sign-in). Never mint the token in the browser, and never put it in the page markup.For example, in Node.js with the
jsonwebtokenpackage:// On your server, for the signed-in customer. import jwt from 'jsonwebtoken'; const token = jwt.sign( { sub: customer.stripeCustomerId, tenant: process.env.SUPPORTROUTE_WORKSPACE_ID, email: customer.email }, process.env.SUPPORTROUTE_WIDGET_SECRET, // srwgt_… { algorithm: 'HS256', expiresIn: '15m' }, ); // Send `token` to the page (for example in your account page's data), then: // SupportRoute.identify(token);
A rejected token falls back to the email code.
Rotating the secret. Choose Rotate Secret, deploy the new secret to your servers, and you are done: the previous secret keeps verifying tokens for 7 days. To end that overlap early, retire the previous secret.
What the customer sees
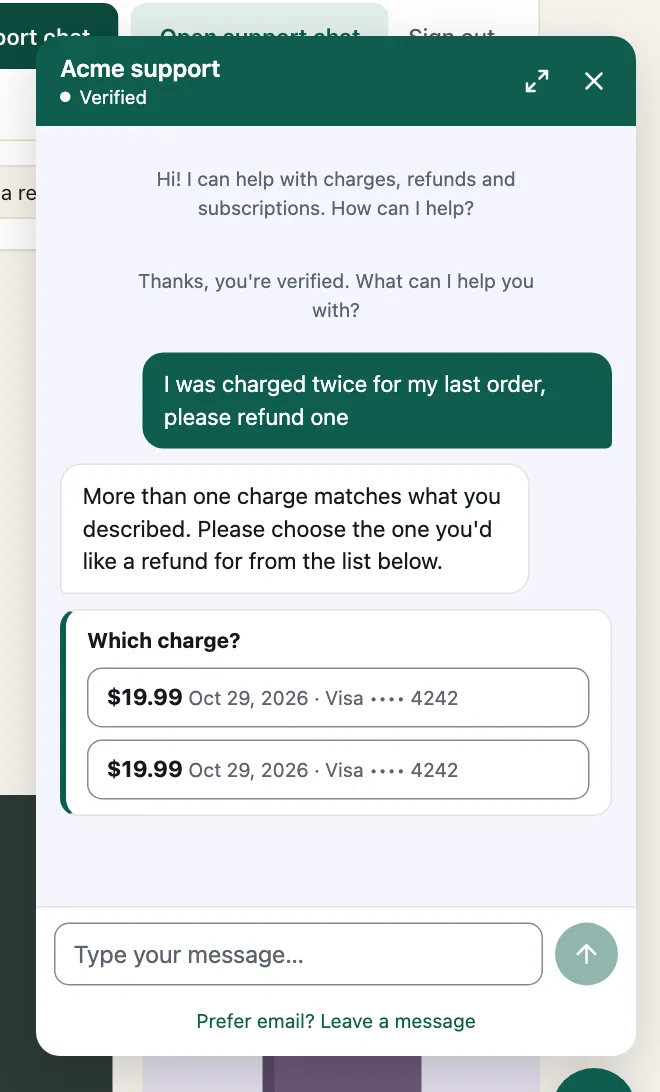
- They say what they need, in their own words. The assistant works out whether it is a refund, a cancellation, an order-status or general question, or a request to talk to a person, and asks when it is unclear. It never guesses which charge they mean.
- They prove who they are (unless your site already did with a token).
- They pick the charge or subscription. A verified customer asking for a refund or cancellation gets a list of their eligible charges ("Which charge?") or subscriptions ("Which subscription?"), newest first, with the amount, date, card brand and last 4 digits.
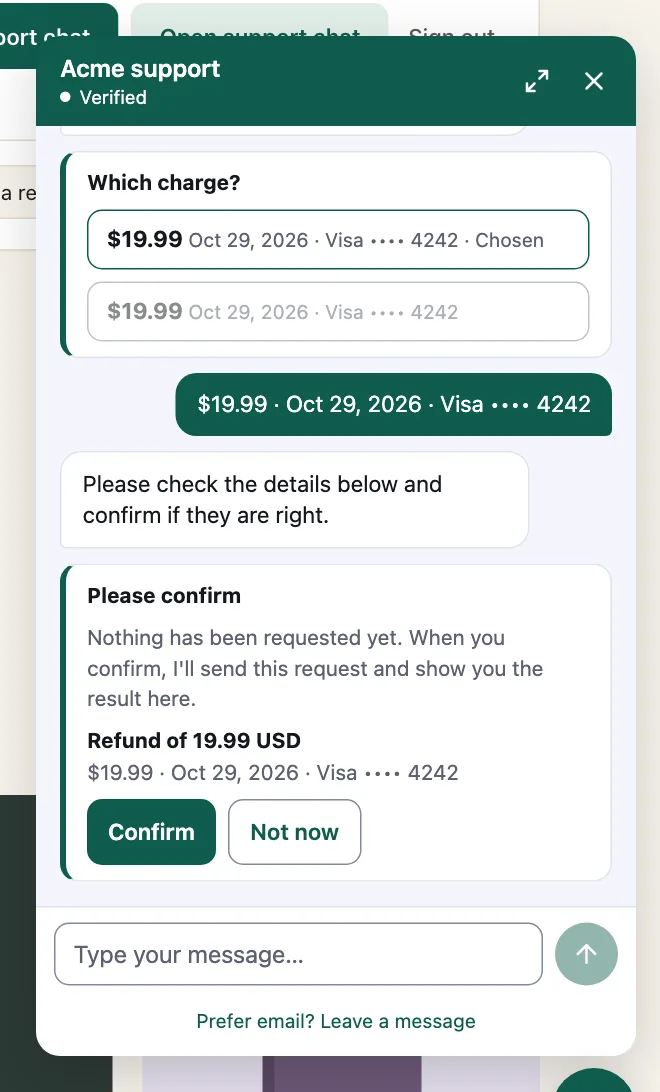
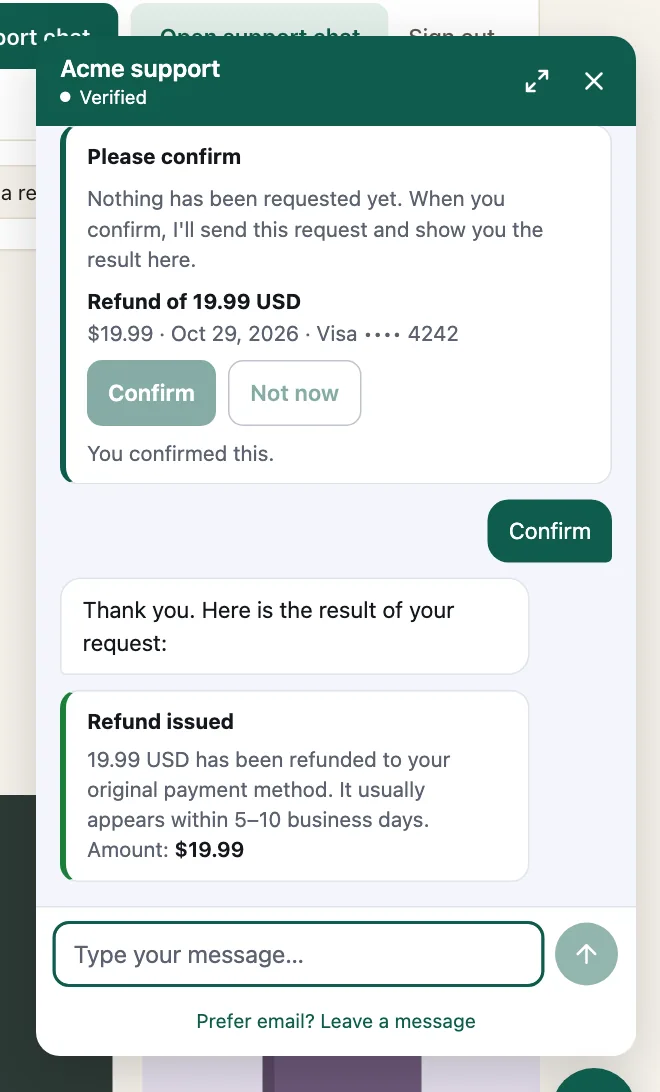
- They confirm. A card shows exactly what will happen, with Confirm and Not now. Nothing is refunded or cancelled before Confirm. The card can be answered only while it is the latest message and for 15 minutes.
- They see the outcome. Outcome cards (refunded, on its way, declined, passed to your team) are built from the actual action record, never written by the AI.
The widget speaks English, Turkish, Spanish, Portuguese (Brazil), French, Arabic (right to left) and Russian, and replies in the customer's language.
When the chat hands off
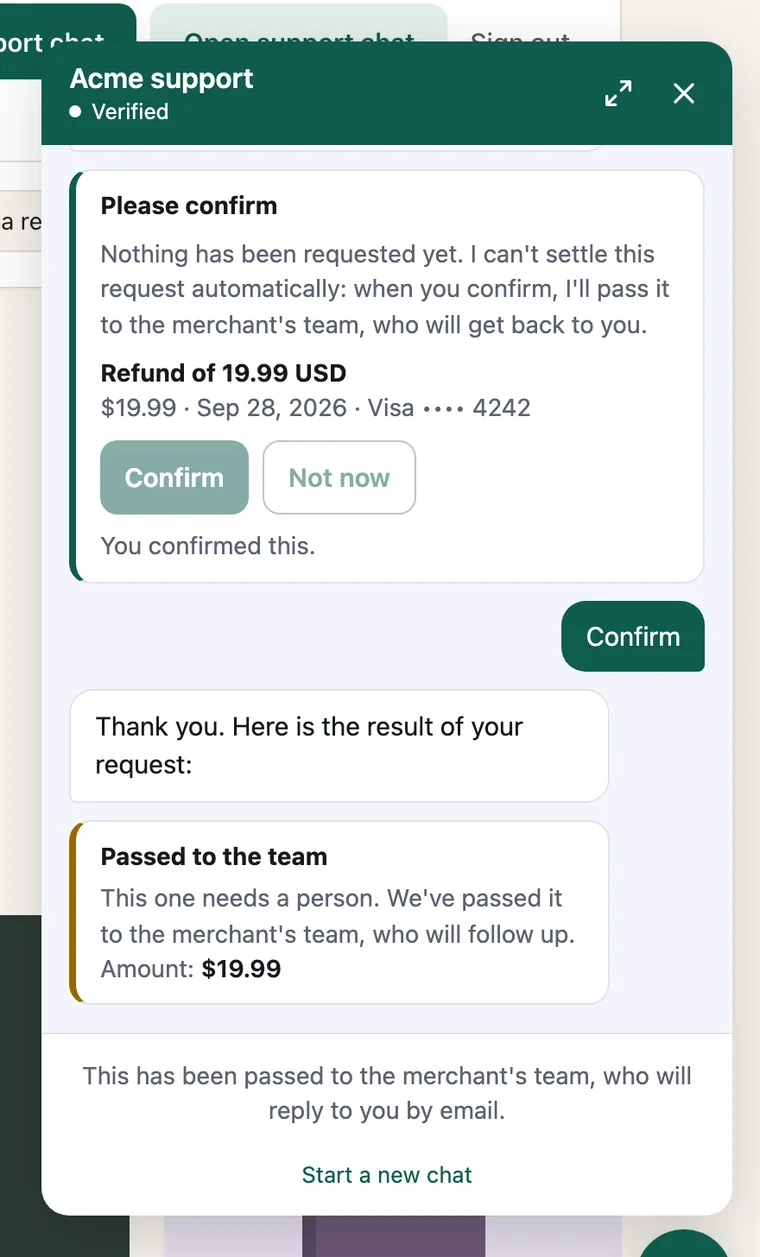
If the request is outside your policy, the confirmation card already says so ("I can't settle this request automatically: when you confirm, I'll pass it to the merchant's team"). After Confirm, or when the customer asks for a person, the chat says "This has been passed to the merchant's team" and closes; the customer can Start a new chat. Your team gets a ticket with the whole conversation (see Tickets).
Your team replies by email. If the customer has not proven an email address yet, the widget asks them to Add email (with a code) so your team can write back. They then get one acknowledgement email naming their ticket number.
Leave a message
Prefer email? Leave a message opens a form (optional subject, message, and a verified email address). Use mode: 'form' to embed the widget as a contact form. These messages become tickets that the automation answers first, by email, and hands to your team when it cannot resolve them.